Woman Creates Wall Partition Using Cardboard – A Creative DIY Project
In a world where home improvement often demands significant time, effort, and expense, Samantha’s innovative approach to partitioning a room stands out as a testament to creativity and resourcefulness. Using cardboard boxes, self-adhesive floor tiles, and a wardrobe, Samantha successfully created a stylish and functional wall. Her project not only provided a practical solution to her space needs but also demonstrated how everyday materials can be transformed into something remarkable.
The Vision
Samantha needed to partition a room in her home to create a separate, private space. Rather than investing in costly construction or hiring professionals, she decided to embark on a do-it-yourself project. Her goal was to build a wall that was both sturdy and aesthetically pleasing, using materials that were readily available and affordable.
Materials and Planning
Samantha began by gathering her materials:
Cardboard boxes: These served as the primary structure for the wall.
Nails: To secure the cardboard to the existing walls and ensure the structure was solid.
Wood glue:
Glue sticks: Glue sticks were used to stick layers of cardboard together to create layers of cardboard in areas which needed fastening.
Wood Glue: She used wood glue to stick the cardboard to the wall reinforcements.
Double Sided Tape: She use double sided tape to stick the cardboard polls to the wall.
Cutters: Cutters where used to trim the cardboard as well as the tiles on both sides of the wall.
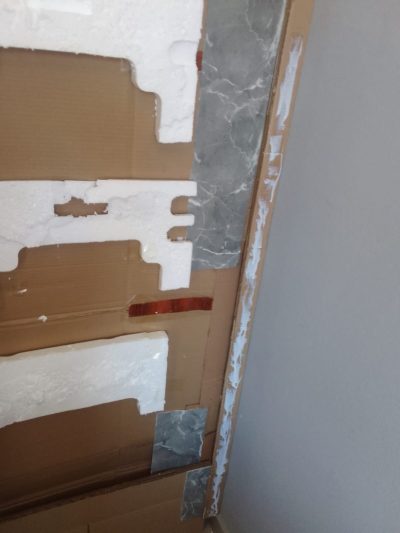
Self-adhesive floor tiles: She chose tiles with a brick pattern to give the wall a realistic brick-and-mortar appearance.
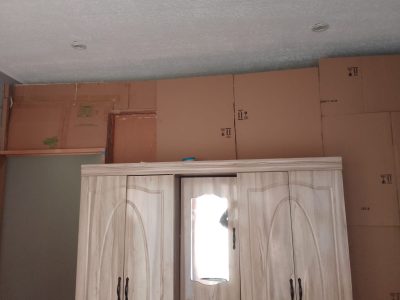
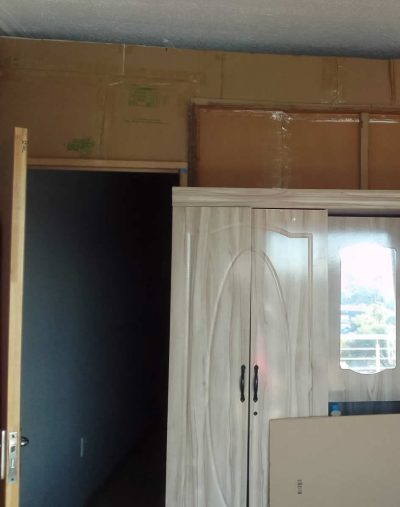
Wardrobe: This piece of furniture was used to reinforce the cardboard wall, providing additional stability.
With a clear vision in mind, Samantha carefully planned the layout of her new wall. She measured the space and determined the dimensions needed for the cardboard panels, ensuring they would fit snugly and provide the necessary coverage.
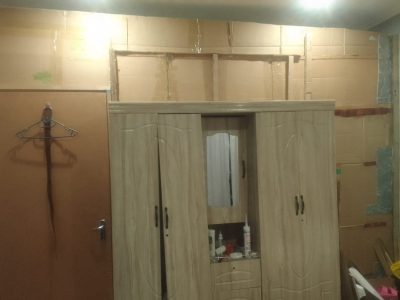
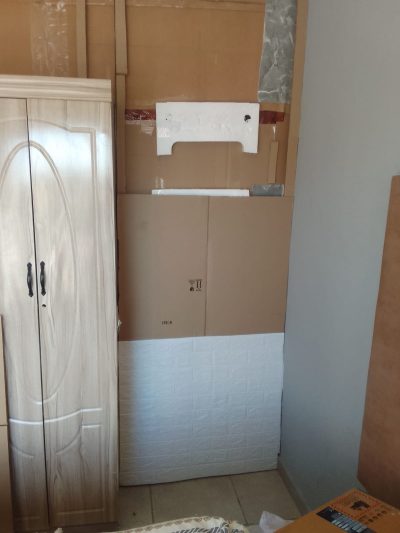
Reinforcing with the Wardrobe:
To add stability, Samantha strategically placed a wardrobe at the center of the cardboard wall. This not only supported the structure but also provided additional storage space, making the most of her limited room.
Building the Wall
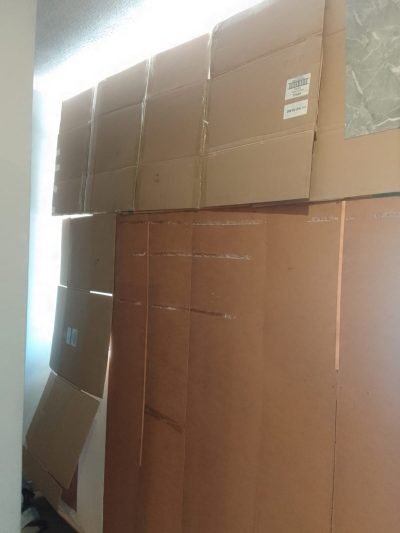
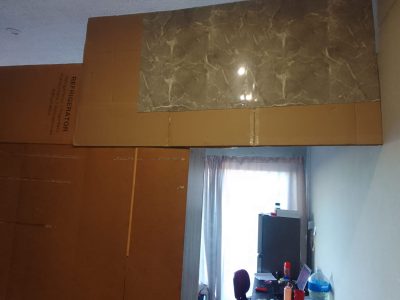
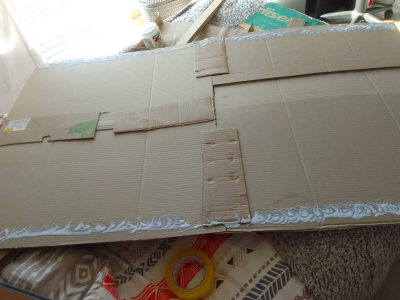
Samantha started by assembling the cardboard boxes, cutting and taping them together to create large panels. She positioned these panels vertically, forming the initial structure of the wall. The cardboard was surprisingly sturdy, but Samantha knew it needed reinforcement.
Constructing the Frame:
She created supporting frames by sticking layers of cardboard to created cardboard panels which where rigid and light weight but strong enough to sustain the cardboard. She also used double sided tape to stick the panels to the wall to support the cardboard panels against the wall.
Securing the Panels:
Using nails, Samantha attached the cardboard panels to the existing walls and the wardrobe. This ensured that the cardboard wall was securely fastened and would not shift or collapse.
The Finishing Touches
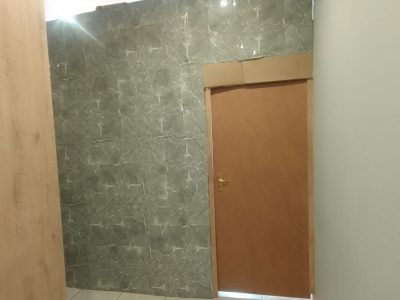
With the basic structure in place, Samantha turned her attention to the aesthetic aspect of her project. She wanted the wall to look like a real brick-and-mortar construction, so she chose self-adhesive floor tiles with a brick pattern.
Door and Door Frame
For the door and door frame, a handyman was hired to help.
Applying the Tiles:
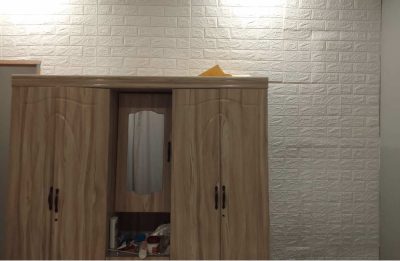
Samantha carefully peeled and stuck the self-adhesive tiles onto the cardboard panels. She took her time to align them properly, ensuring a seamless and realistic look. The tiles not only enhanced the appearance of the wall but also added an extra layer of durability to the cardboard.
Final Adjustments:
After the tiles were in place, Samantha made any necessary adjustments, trimming the edges and smoothing out any bubbles or creases. She stood back to admire her work, satisfied with the transformation she had achieved.
The Result:
Cardboard Wall interior
Cardboard Wall Exterior
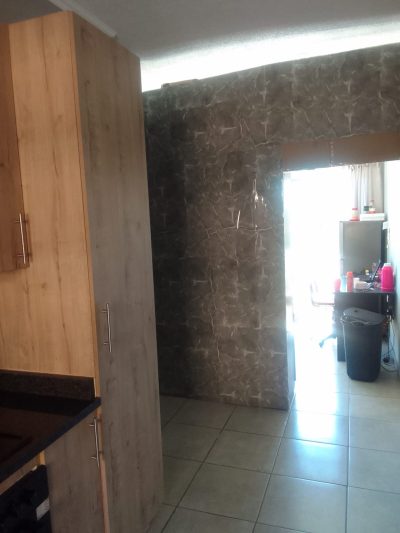
Samantha’s DIY partition wall was a success. The combination of cardboard boxes, a wardrobe, nails, and self-adhesive tiles resulted in a sturdy and visually appealing wall that effectively divided the room. The brick-look tiles gave the wall a realistic appearance, creating the feel of a traditional brick-and-mortar structure.
Her project not only solved her immediate need for a partition but also showcased her creativity and ingenuity. Samantha’s approach demonstrated that with a bit of imagination and resourcefulness, anyone can tackle home improvement projects without breaking the bank.
Conclusion
Samantha’s innovative use of everyday materials to create a room partition is an inspiring example of what can be achieved with creativity and determination. Her project highlights the potential of DIY solutions in home improvement, offering a practical and cost-effective alternative to traditional construction methods. Samantha’s cardboard and tile wall is more than just a partition; it is a testament to the power of ingenuity and the art of making the most of what you have.
